Rain Theme
It's raining again and no going outside so here are just a few rain theme ideas to bring a little sunshine into your classroom.
Splatter Painting
|
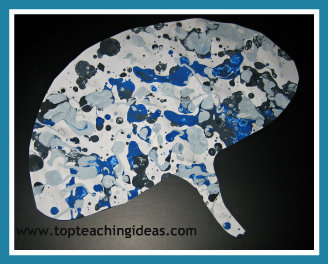
This is an old favourite that kids never seem to tire of and lends itself to the rain theme well i think. It is messy so have plenty of newspaper over the table and make sure the kids are well covered! |
What you will need is
- some blue and grey poster paint in tubs or paint pots,
- some thickish paintbrushes,
- blue cartridge paper.
Probably best to allow the kids to do this one at a time and with an adult close at hand and also to do this as a joint project. Small pieces of paper often get missed!
Let them dip their paintbrushes in the paint and splatter the paint all over the paper using both the colors so you get a rain effect.
When it is dry you can cut out umbrella shapes for the kids to take home.
Raindrops
|
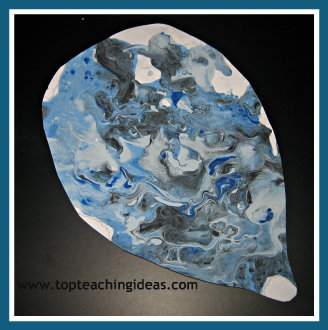
Once again, a bit of a messy activity but fun to do and can look really effective on the wall as part of a display board. I used it when doing Incy Wincy Spider and put several raindrops under the storm clouds. |
Again you will need
- blue and grey paint or any other colour you think is a rain colour,
- a plastic pipette to drop the paint on to the paper with ,
- a straw
- some cut out raindrop shapes perhaps a mixture of grey and white.
Then you just get the kids to squeeze drops of paint onto the raindrop shape with the pipette and blow through the straw to move the paint about the raindrop to look like rain.
I have also done this rain theme activity without pipettes or straws and just given the kids some black and white paint and a paint brush and asked them to put a blob of each colour onto their raindrop and mix the colors together to look like a rain cloud. Just as effective I think.
Rainsticks
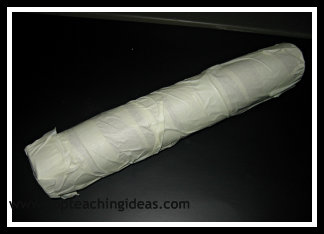
This rain theme activity has a great deal of appeal to kids because they can make different sounds with the stick depending on the substance they put inside. With younger children you will probably need to make the rain stick yourself but older ones will undoubtedly enjoy the making of it as much as playing with it later.
What you will need for the stick is
- a paper towel roll,
- wooden skewers,
- a nail,
- thick sticky tape or duct tape,
- scissors or secateurs.
Instruction 1: Using your nail, make holes in the paper towel roll every few inches down the length of the roll and repeat this down the opposite length.
2: Break the skewers into 3 even lengths and push each one through the hole in one side to the hole on the opposite side.
3: When all the skewers [and holes!] have been used up you will need to cut off the sharp ends that are sticking out with scissors or better still gardening secateurs. To make sure there is no nasty sharp bits sticking out I wrapped thick tape or Duct tape round the outside of the tube from the top to the bottom.
4:Fasten the bottom of the tube with yet more tape and that is the main part of the rain stick finished.
I think it's good to give the kids a bit of a challenge when giving them an activity.This way they are more likely to get involved and gives you the opportunity to ask them questions afterwards.
So I gave them different substances to pour into their rain sticks so they could see how many different sounds they could make. Incidentally, the more skewers you put into the tube the better the sound it makes.
I put rice in one bucket and different types of beans in another but you can use almost anything that is dry and makes a rattle.
It makes it easier for the kids if you provide them with a scoop or spoon so they can pour small amounts in at a time .
Just one more thing you can do is to give them another tube without the skewers through it for them to compare the sounds.
Spooning Raindrops
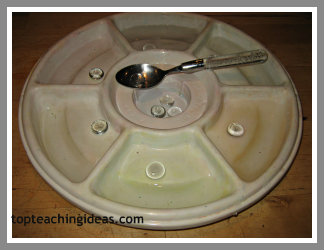
I have done this many times with small objects and a pair of tweezers to help develop fine motor skills. This activity is also excellent for this but is magical too!
You use clear flat marbles and a small plastic measuring spoon [or just a bog standard tea spoon.] and one of those plastic trays that the kids use for sorting. Also a tub to keep the marbles in.
Then they just enjoy the experience of carefully lifting the 'raindrops' out of the tub and placing them into the sorting tray.They love the smooth feel of the marbles and there is quite a lot of potential descriptive language skills to be harvested here!
Rain Theme Painting
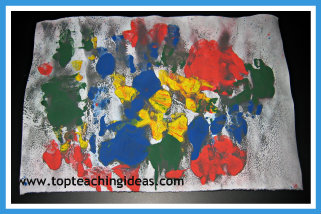
As it implies this rain theme task involves getting wet!
You need no art expertise to achieve fab results doing this activity but you will need to get ready the following:
- A piece of white paper
- A plastic tray
- Some bright coloured powder paint
- Several small spoons
- And RAIN !
Scatter spoonfuls of the coloured powder paints all over the white paper making sure you get an even coverage and distribution.
When done ,put the piece of paper in the plastic tray and carry it outside [providing it's raining] and leave for a few minutes until the paints have smudged and run into one another. Bring it indoors and allow to dry and sit back and admire you're masterpiece!
Welcome!
Need inspiring teaching ideas? You have come to the right place.
